Building CompuCell3D on Windows using Visual Studio 2015 and Python 3.6+
Building CompuCell3D from source on Windows systems using freely available Visual Studio 2015 is fairly straightforward. We provide all dependencies so the only thing you need to do is to install Visual Studio 2015 (Community Edition is free and fully functional) , SWIG, CMAKE and GIT for windows . The following will help you build and install CC3D on most Windows systems.
Prerequisites
Hardware
CompuCell3D may build and run with less capable hardware, but has been tested with the following:
- 1 GB RAM
- Hardware 3D Graphics Acceleration (most modern graphics cards)
Build Tools and Dependencies
SWIG, CMAKE and GIT for windows
SWIG (version 2.0 or higher recommended) - after installing SWIG add SWIG installation directory to search path
CMAKE (CMake-GUI is recommended)
- A directory with precompiled dependencies (that include Python and all libraries that CC3D depends on)
Installing CC3D Compile Dependencies
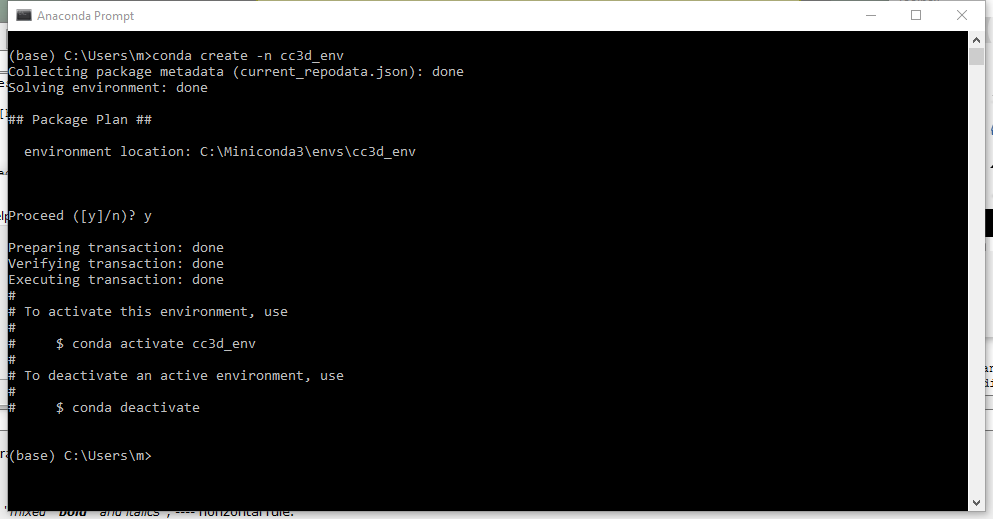
We provide all compile dependencies in our compucell3d conda channel. All you need to to is to install miniconda: https://docs.conda.io/projects/conda/en/latest/user-guide/install/ and then open up anaconda prompt and create python environment where you will install your dependencies:
conda create -n cc3d_env
Next we activate newly created environment
conda activate cc3d_env
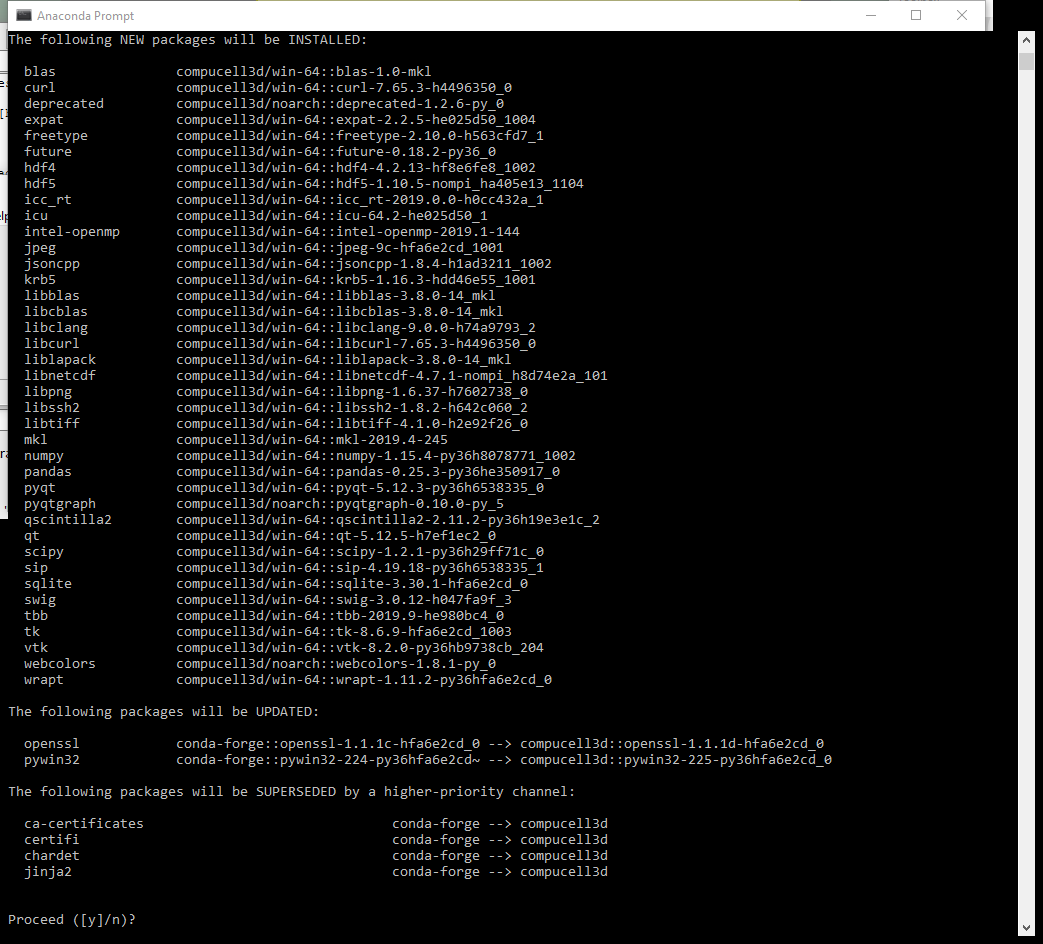
and at this point we can start installing packages. We first install essential packages that are stored in Anaconda compucell3d channel:
conda install -c compucell3d vtk=8.2 scipy numpy=1.15 pandas jinja2 pyqt qscintilla2 webcolors pyqtgraph deprecated pywin32 chardet swig=3 requests
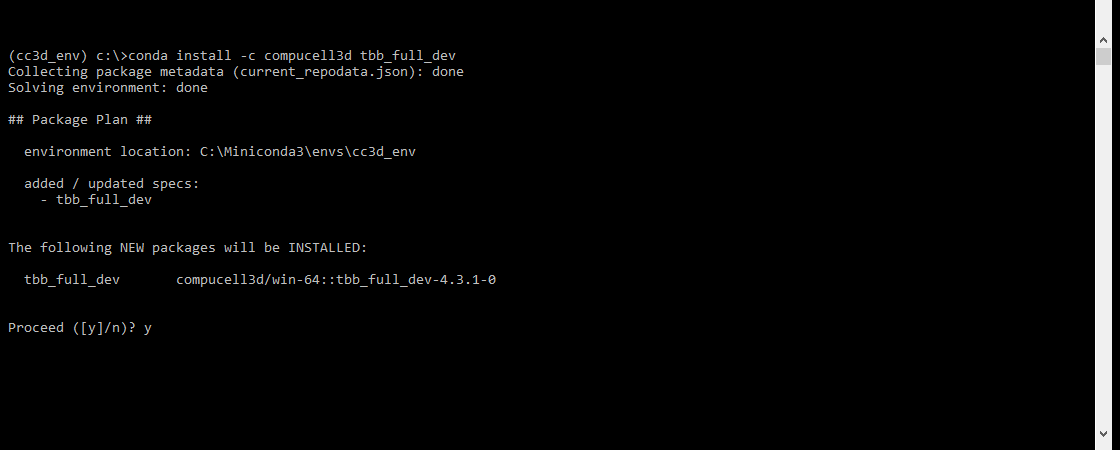
and then to fix a problem with tbb library dependency (this is the issue related to vtk 8.2 conda package) we install tbb_full_dev package
conda install -c compucell3d tbb_full_dev
It is important to ensure that you do two last step separately and in order as outlined. As you can see all of the dependencies come from compucell3d channel. We archived them to ensure reliable way of creating appropriate conda environment for CC3D compilation.
Source Code
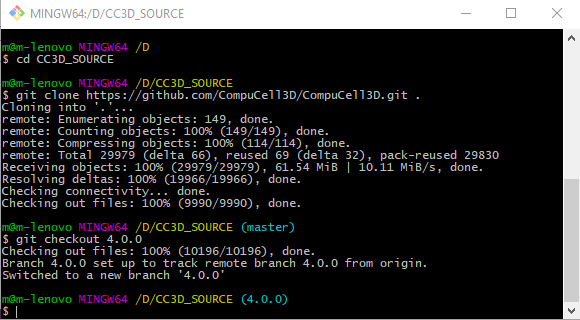
Once the dependencies have been satisfied, obtain the source code from our GIT repository using the following command from git command-line tool:
git clone https://github.com/CompuCell3D/CompuCell3D.git D:/CC3D_SOURCE
git checkout 4.0.0
After cloning we also checkout master branch (or any of the 4.x branches)
This will create a directory d:\CC3D_SOURCE` and download the source code into it.
At this point we are ready to configure CC3D for building using Visual Studio 2015
Generating VS 2015 project using CMake
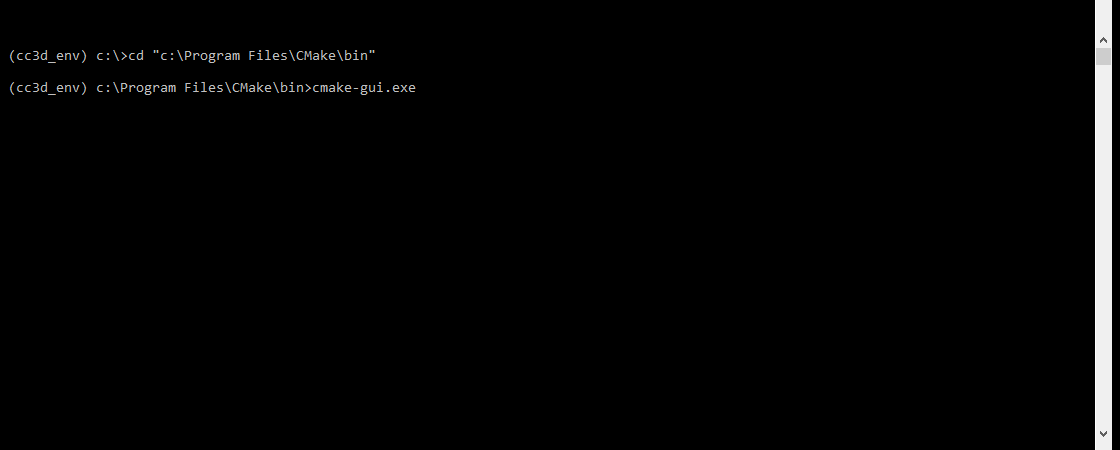
To ensure easy CMake configuration we will start Cmake from Anaconda console that is activate to be in the cc3d_env environment. The reason for this is that this way many of the paths will be correctly set by CMake and it will save us time with configuration step. The only thing we will need to modify are Python paths but Cmake often struggles setting them correctly especially if on your system you have multiple installations of Python. We will walk you through all those steps
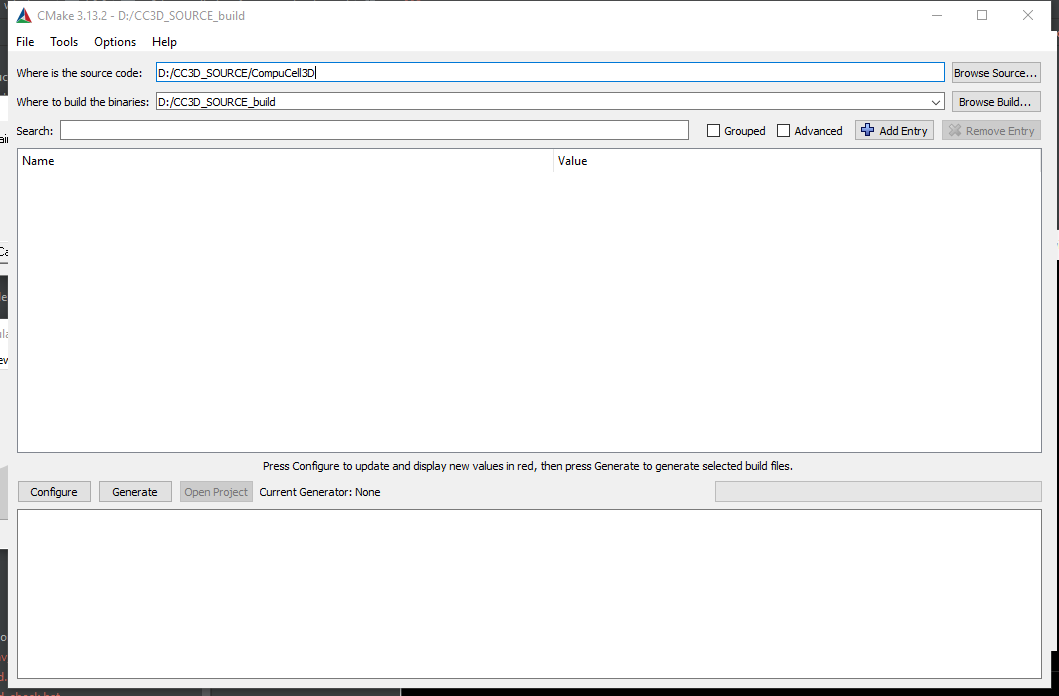
CompuCell3D is configured using the CMake build system. Double-click CMake icon and set source and build directories to d:\CC3D_SOURCE\CompuCell3D and D:\CC3D_SOURCE_build as shown below:
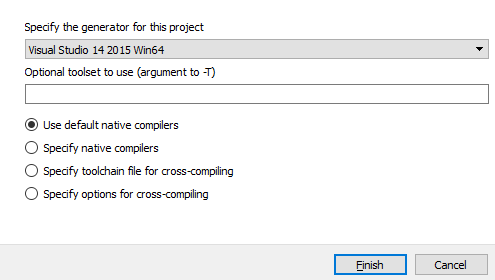
After clicking Configure you will get a pop up dialog where you should select Visual Studio Project 2015 as a target project generator - here we will choose 64-bit build
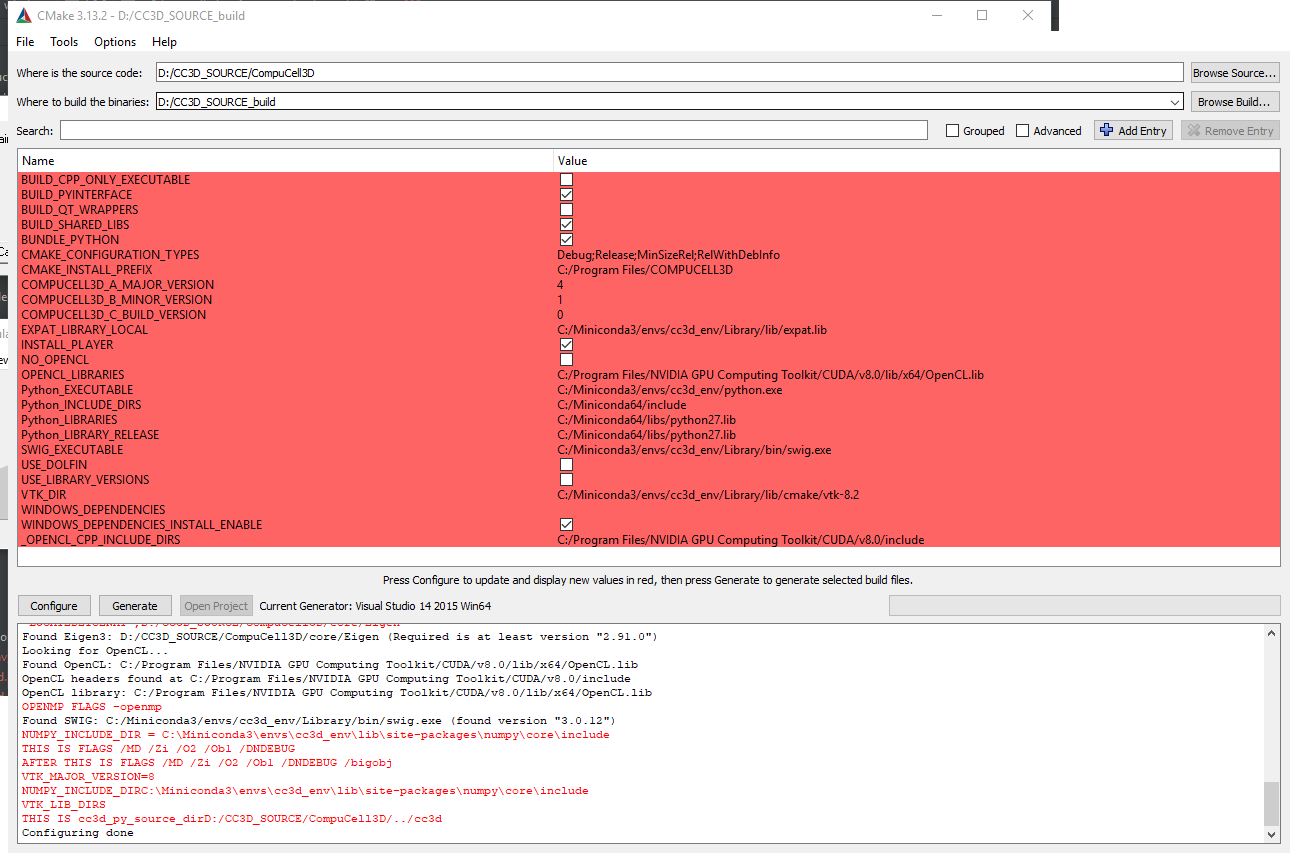
After configuration is done you will get a screen that looks somewhat similar to the one below:
As you can see it informs you that the error has occurred. This is normal and it means we need to provide certain type of information to CMAKE:
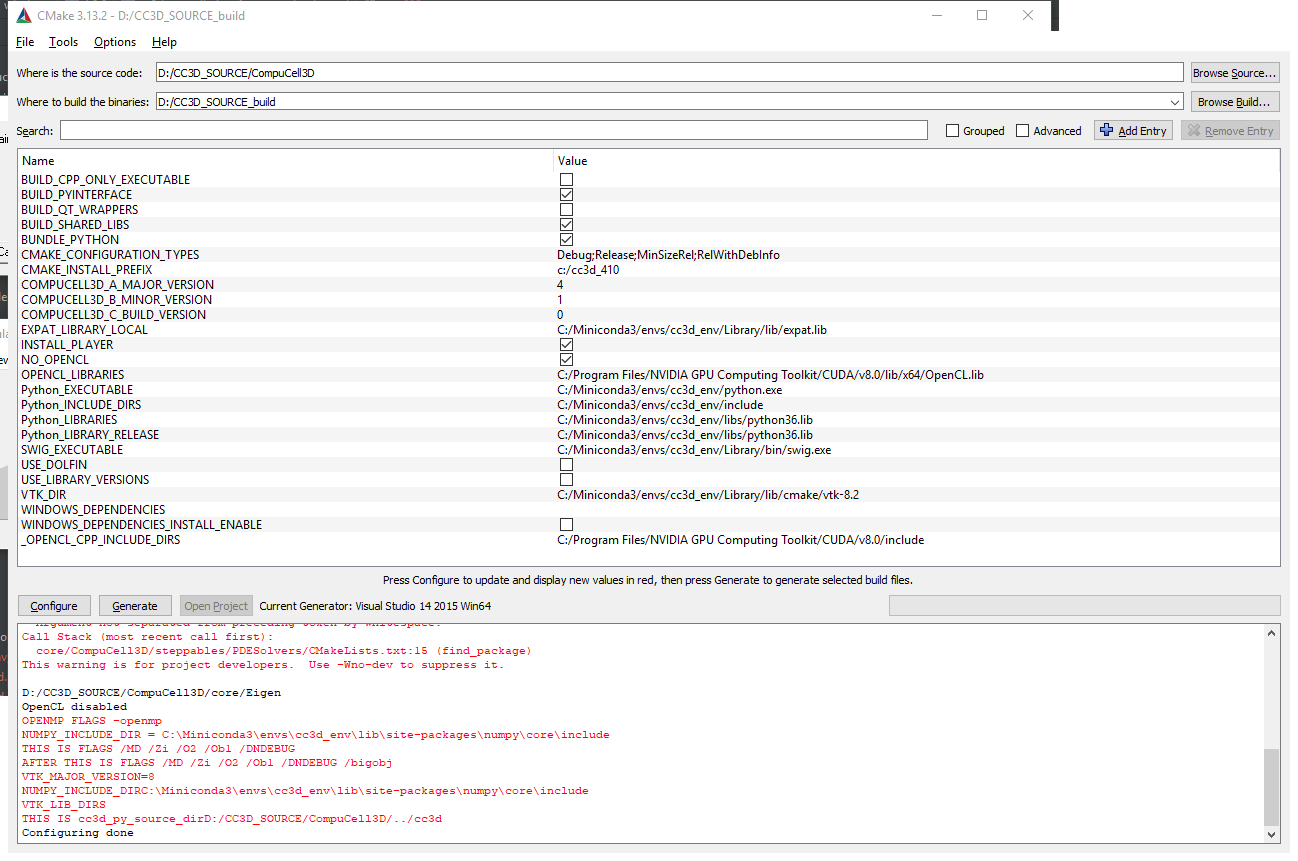
Folder into which we should install CC3D (CMAKE_INSTALL_PREFIX = c:/cc3d_410)
Set WINDOWS_DEPENDENCIES_INSTALL_ENABLE to Off
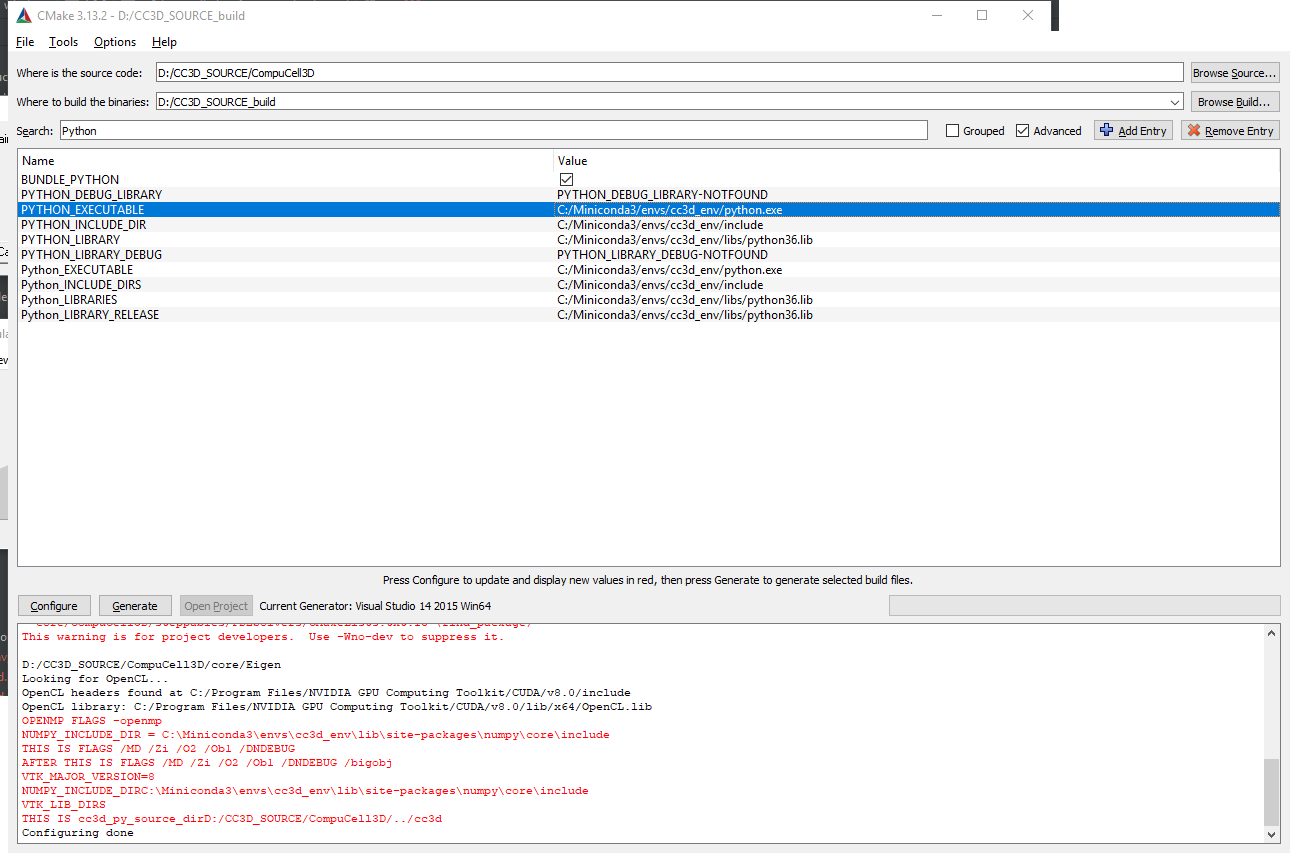
- Fix Python Paths to point to correct include, library and executable. As you can see the executable is identified correctly but other Python paths are not
To make sure that Python library, Python include path and Python executable point to the Python distribution that is in out conda repository cc3d_env we click Advanced check-box at the top and type Python in the search bar next to the box you have just clicked. Then we input the following (obviously, in your case, you need to input paths to the libraries installed on your system, but if you installed Miniconda using default settings you most likely will end up with identical paths as presented in this example):
Python_EXECUTABLE = C:/Miniconda3/envs/cc3d_env/python.exe
PYTHON_EXECUTABLE = C:/Miniconda3/envs/cc3d_env/python.exe
PYTHON_INCLUDE_DIR = C:/Miniconda3/envs/cc3d_env/include
Python_INCLUDE_DIRS = C:/Miniconda3/envs/cc3d_env/include
PYTHON_LIBRARY = C:/Miniconda3/envs/cc3d_env/libs/python36.lib
Python_LIBRARIES = C:/Miniconda3/envs/cc3d_env/libs/python36.lib
Python_LIBRARIES = C:/Miniconda3/envs/cc3d_env/libs/python36.lib
Python_LIBRARY_RELEASE = C:/Miniconda3/envs/cc3d_env/libs/python36.lib
After we input these changes (see below) and click Configure again we will get the following screen:
You may check NO_OPEN_CL option if you do not have OPEN_CL toolkit installed
Click Configure , followed by Generate buttons and then open up Visual Studio 2015.
Compilation with Visual Studio
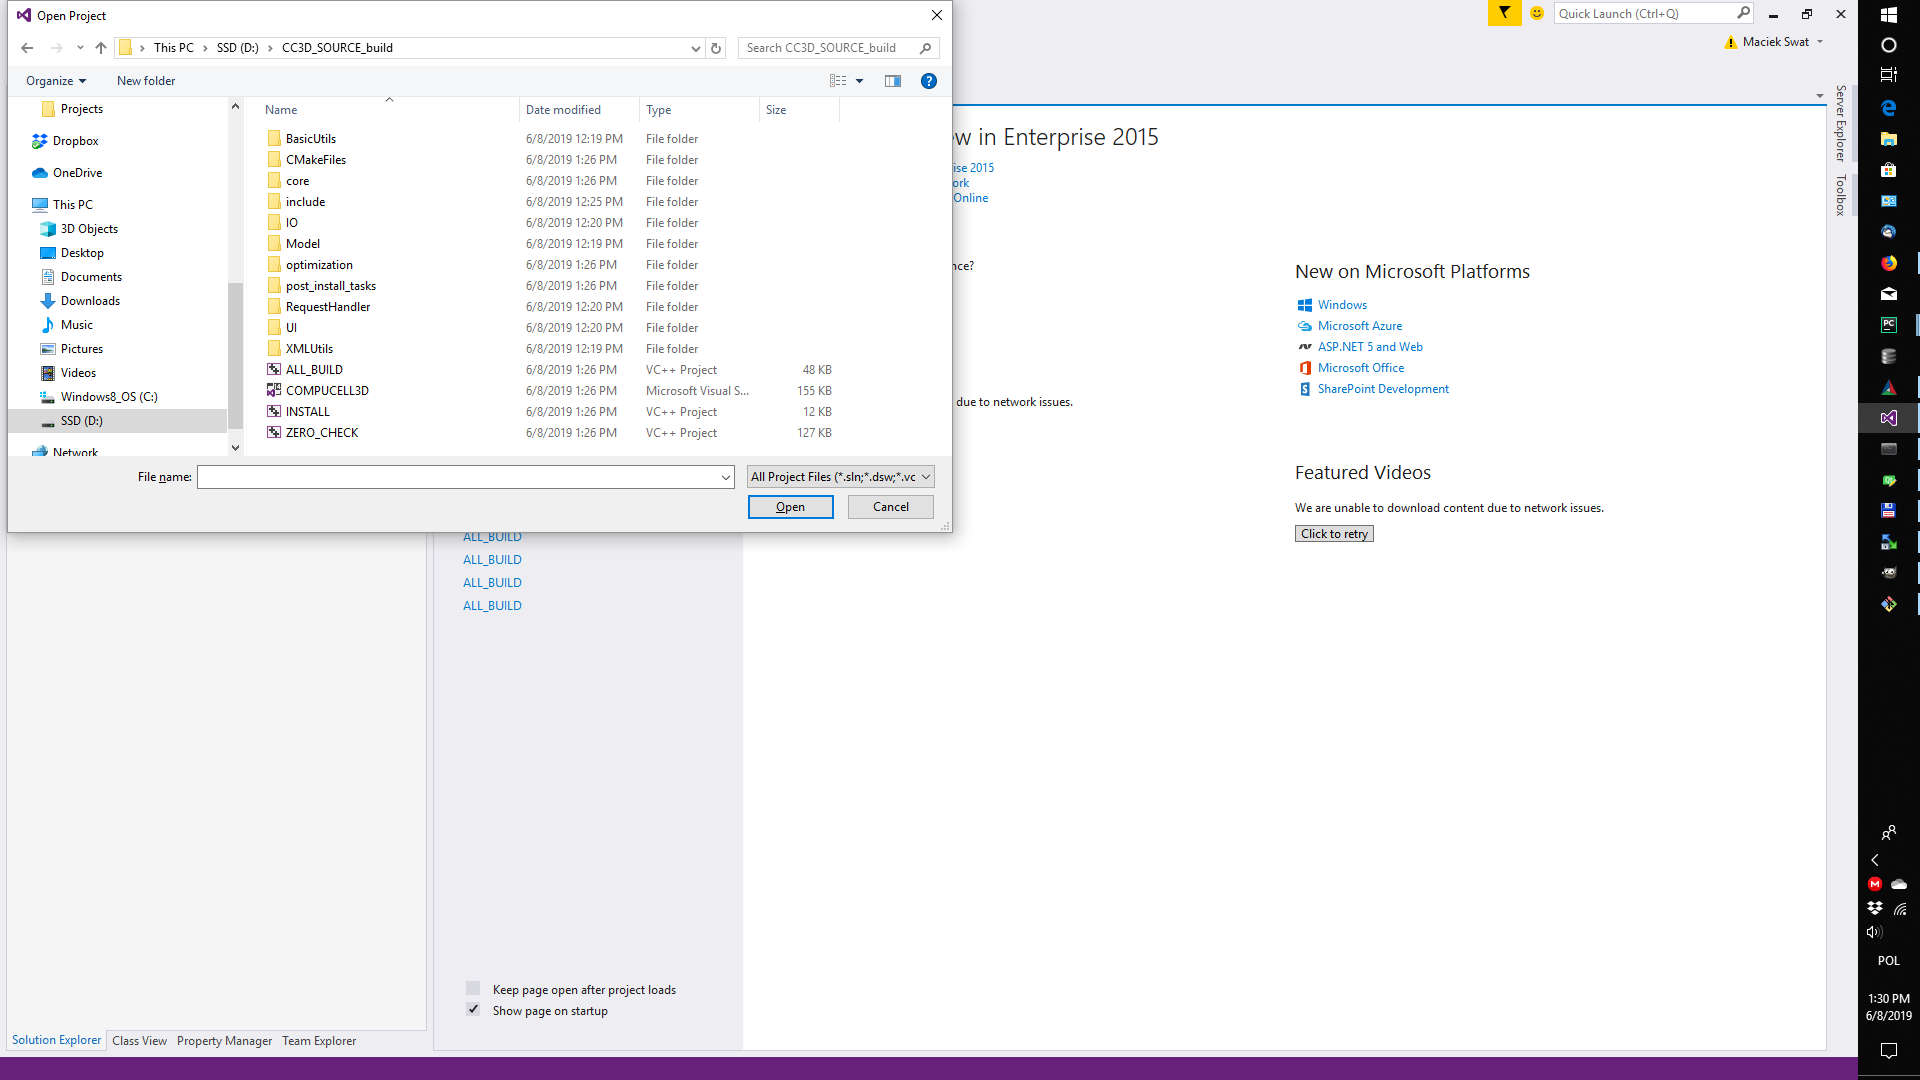
1. Open up ALL_BUILD project in D:/CC3D_SOURCE_build - go to File->Project/Solution... and navigate to D:/CC3D_SOURCE_build and choose ALL_BUILD:
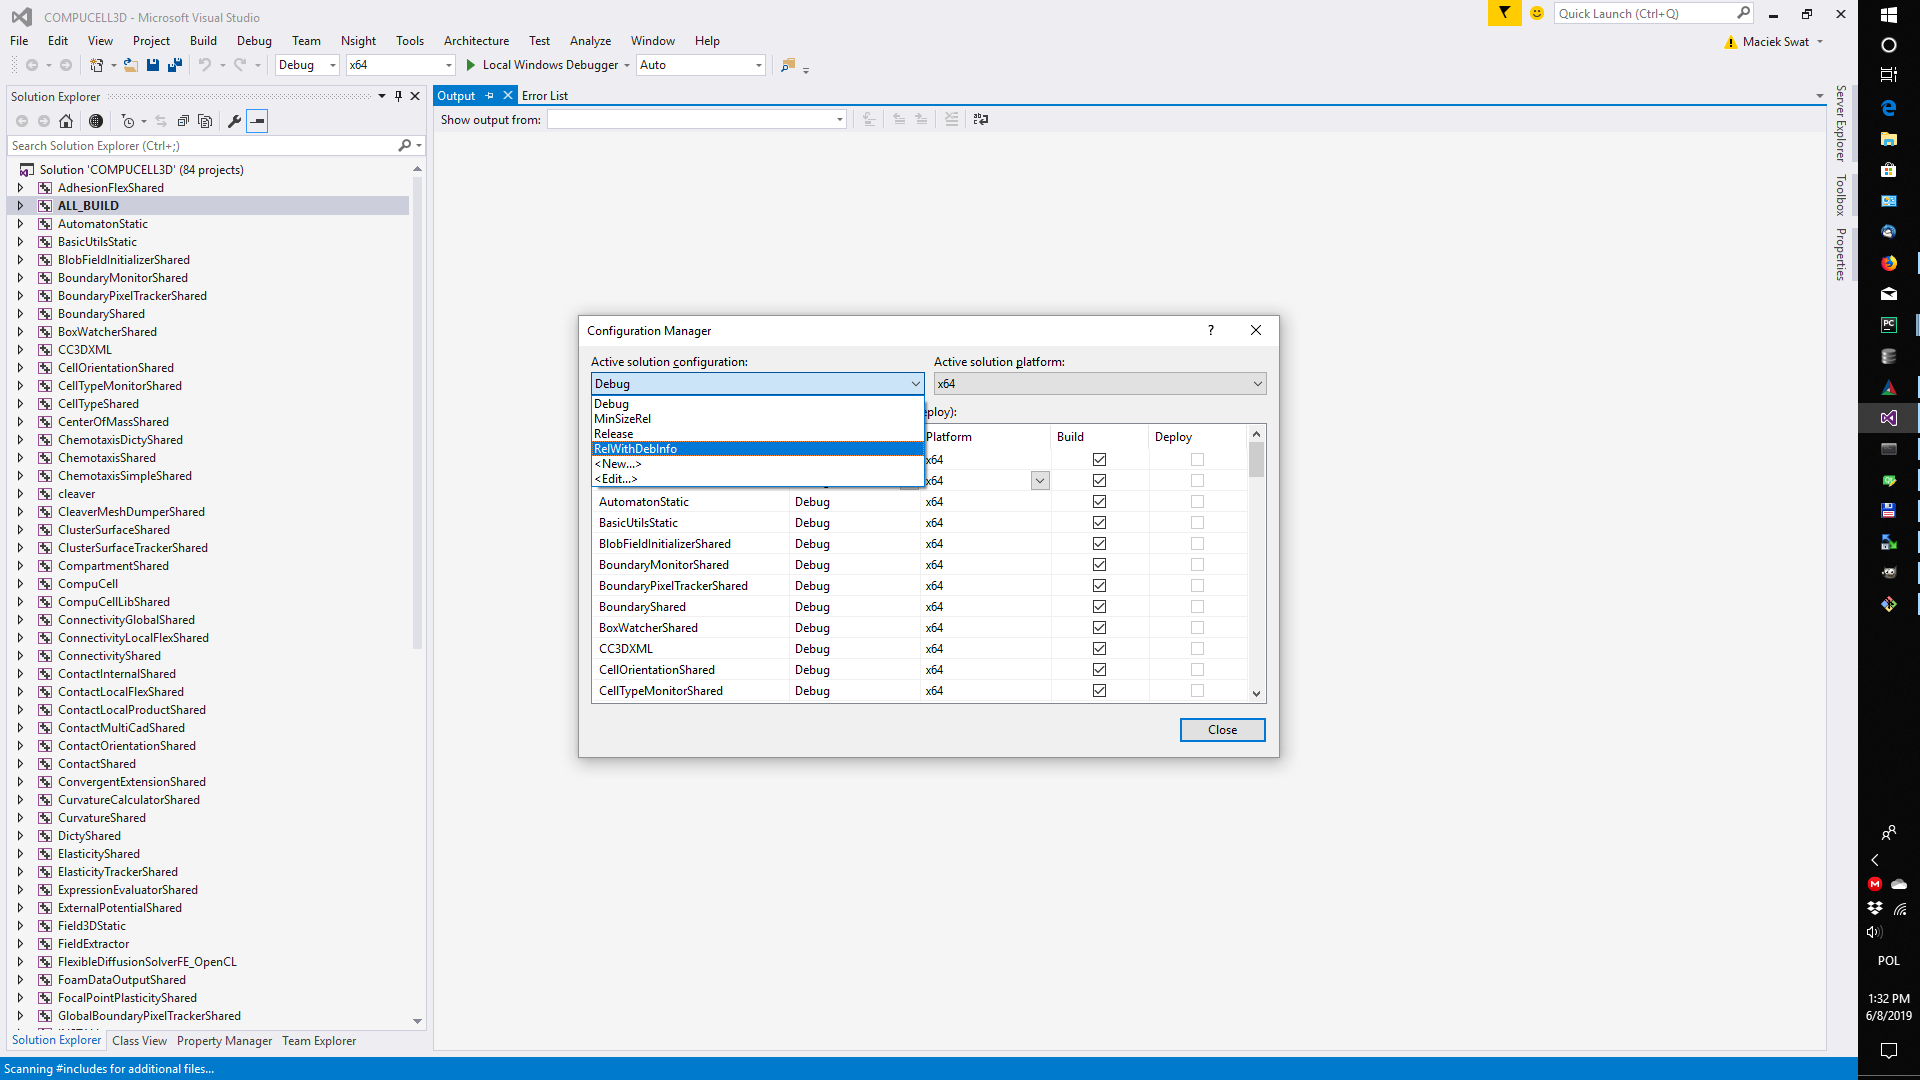
2. Change build configuration to Release or RelWithDebInfo - go to Build->Configuration Manager... and pick RelWithDebInfo from pull-down menu:
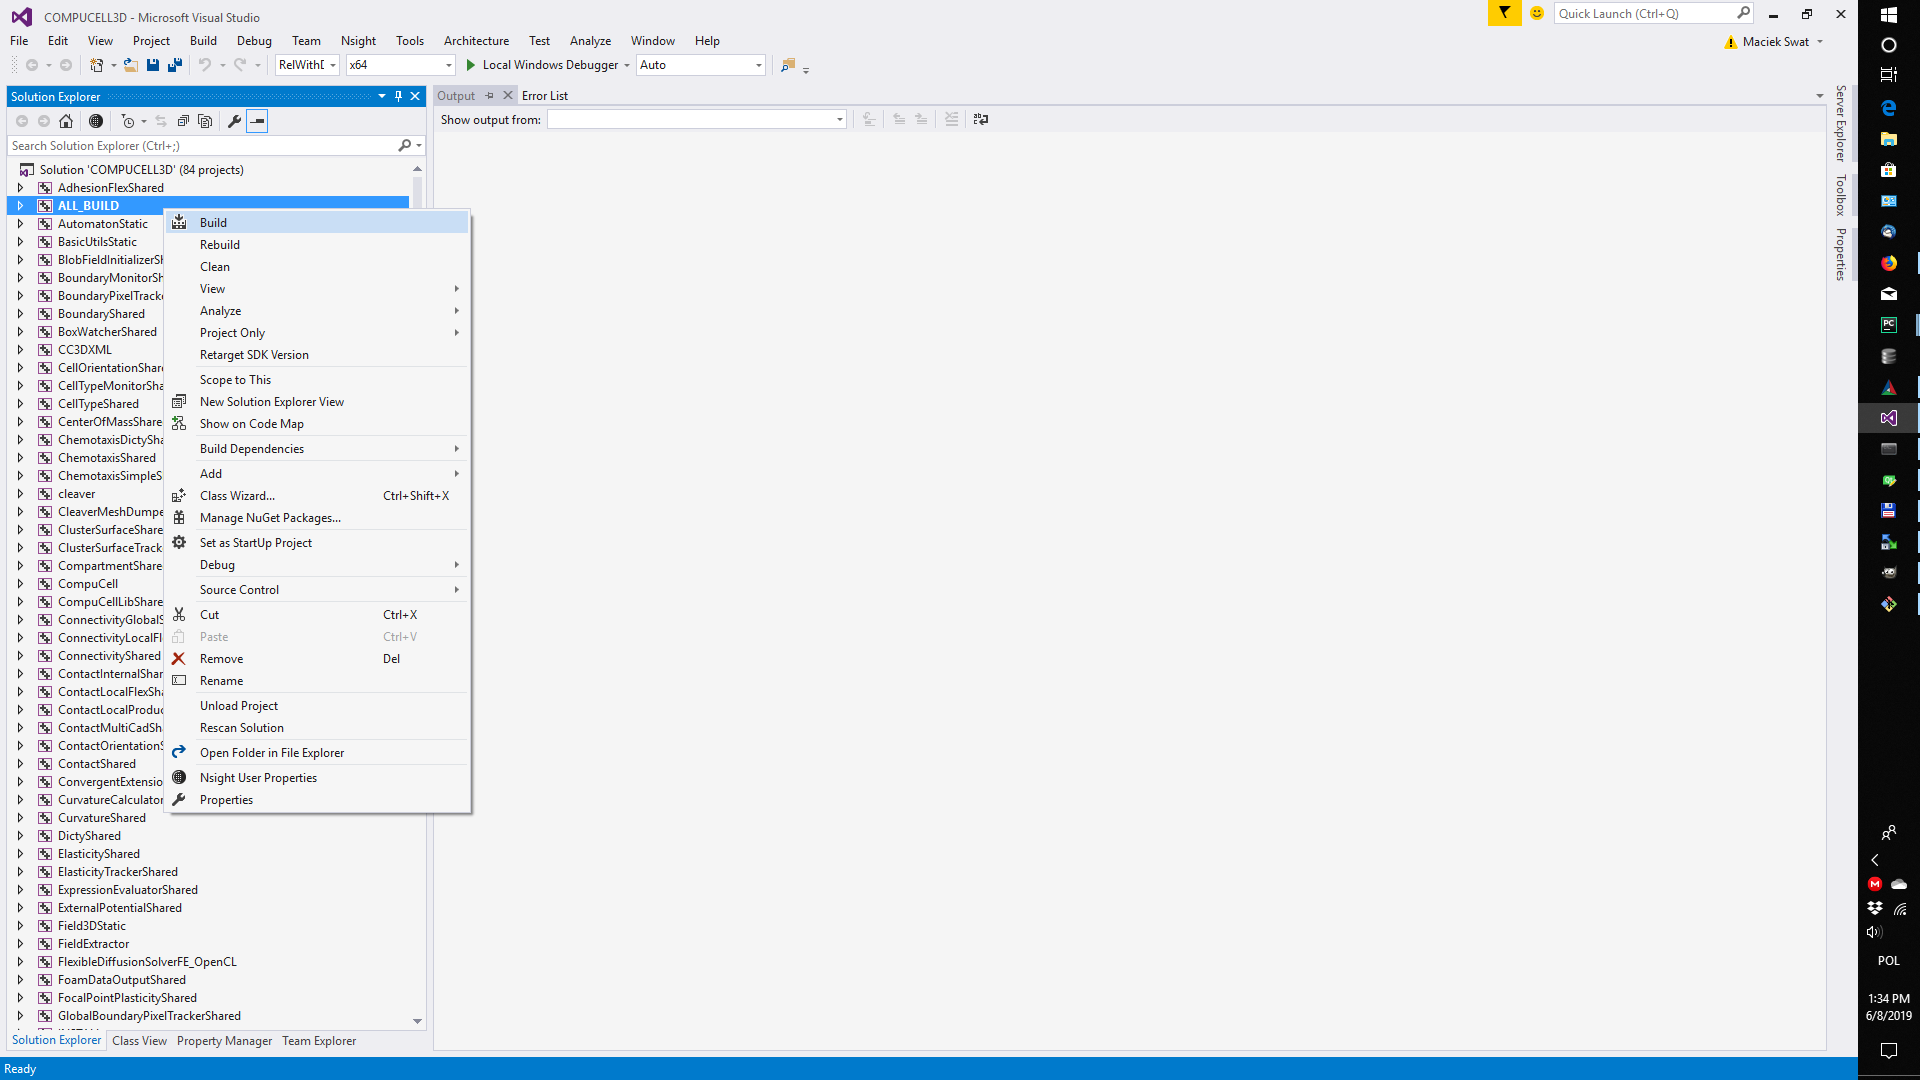
3. Right-click on the ALL_BUILD in solution explorer and choose build from the context menu to start compilation
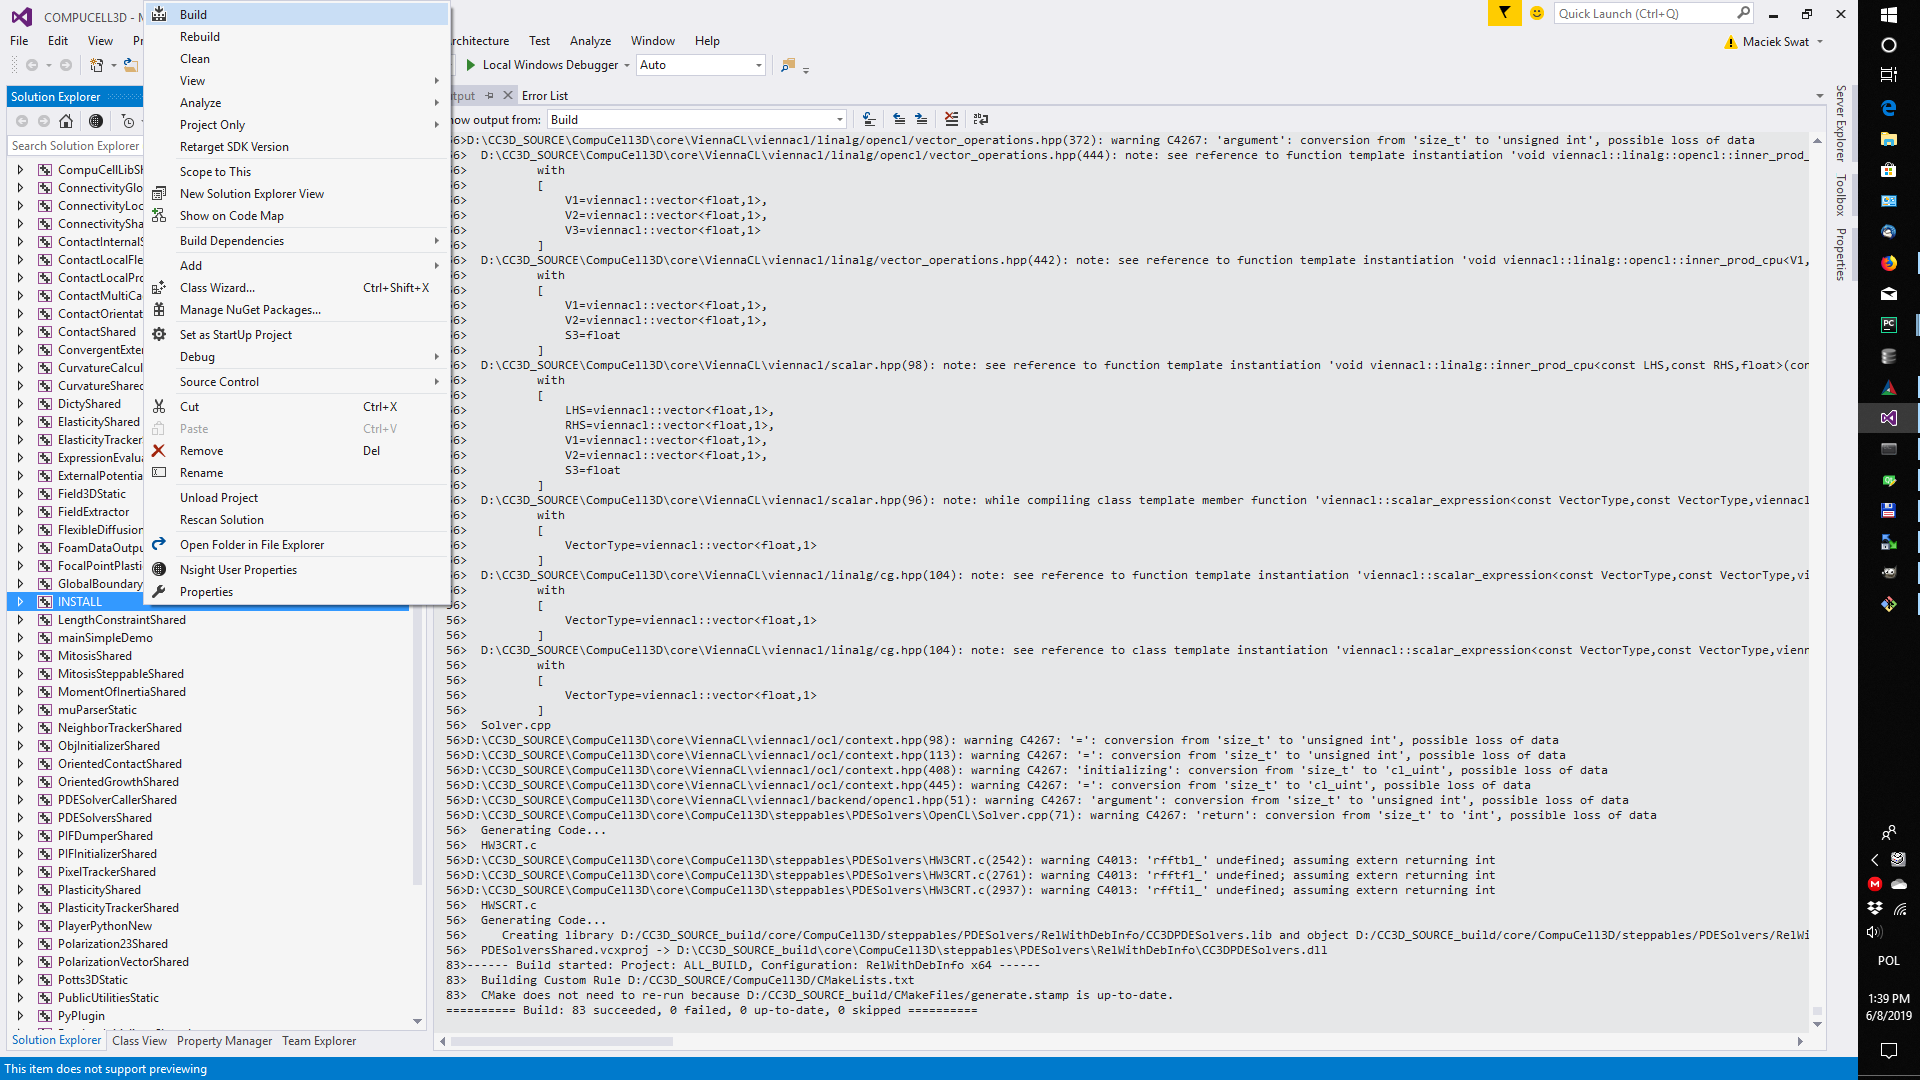
4.Right-click on the INSTALL in solution explorer and choose build from the context menu to install CompuCell3D into d:/cc3d_400
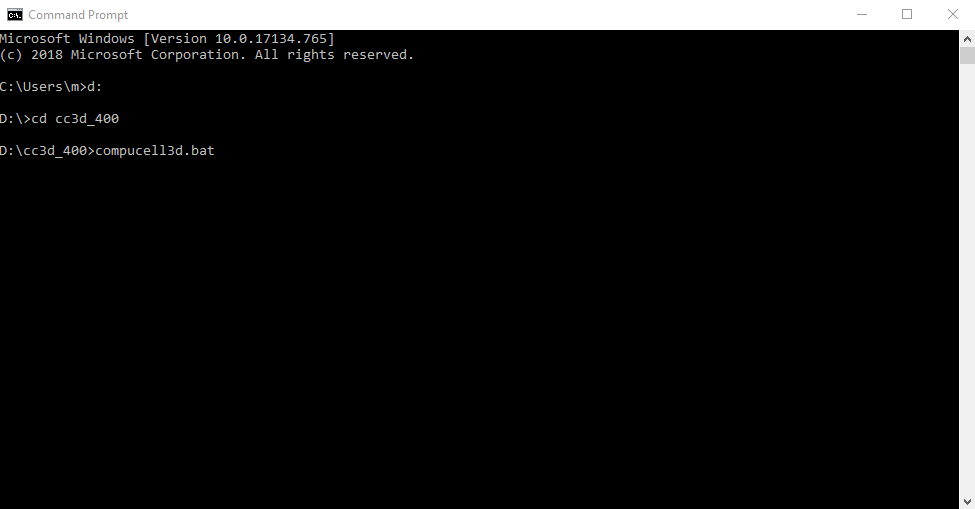
It takes a while for windows to copy all the files to the installation folder but once this is done , go to the directory where you installed CC3D by typing at command-line prompt
D:
followed by
cd cc3d_400
followed by CompuCell3d start-up script:
compucell3d.bat
This completes manual build of CC3D on Windows using Visual Studio 2015.
 CompuCell3D