Generating C++ Steppable Inside DeveloperZone Folder - One-Click Twedit++ shortcut
In this tutorial I will show you how to autogenerate code for a C++ CompuCell3D Steppable using Twedit++. Note we have developed a video tutorial that walks you through most of the steps outlined in this tutorial. There are some differences but if you prefer to watch video here is the video tutorial
Sometimes when working on your simulation you may find Python code to be a bit of a bottleneck and you may want to speed things up using C++ . This is a good strategy but as you will quickly discover it requires a bit more work than developing Python code. Therefore we suggest that before resorting to C++ you try to optimize your Python code first. However, there is no denying that properly written C++ code will almost always outperform its Python equivalent.
Before we begin I will assume that you already know how to compile CC3D from source and that you have already compiled CC3D and have it available somewhere on your computer. If you need help with basic CompuCell3D compilation check one of those tutorials
Generating C++ Steppable Code using Twedit++
To generate C++ steppable code , open up twedit and select CC3D C++ -> Generate New Module ... - as shown below

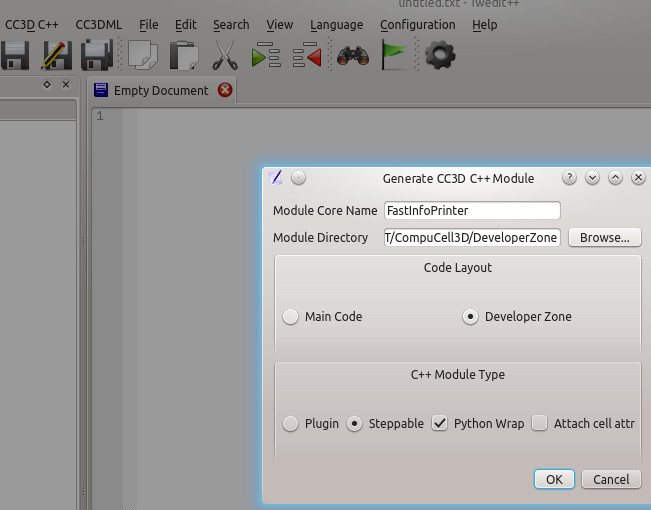
After that a pop-up dialog will display where you specify the name of your module (I used FastInfoPrinter) and the location of the folder in the CC3D source tree where to generate new code. In our case we will use DeveloperZone folder because this way we will not "pollute" main CC3D code but rather develop module that is external to the CC3D main source tree. In my case my CC3D git repository is stored in /home/m/CC3D_GIT and the DeveloperZone is located in /home/m/CC3D_GIT/CompuCell3D/DeveloperZone - and I will use it to populate Module Directory in the dialog below. in addition in the Code Layout section I pick DeveloperZone and in the C++ Module Type I select Steppable and also check Python Wrap to allow this steppable to be accessed from Python (to e.g. conveniently pass some parameters to it from Python script).
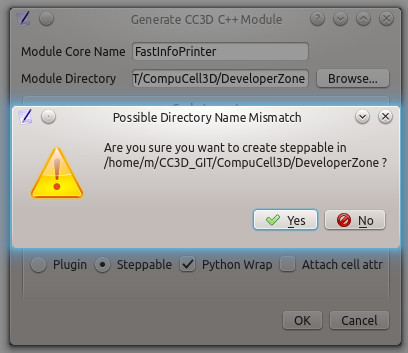
After we click OK button we will get warning dialog asking us to confirm whether we are sure that we weant to generate new code and we click Yes in that dialog:
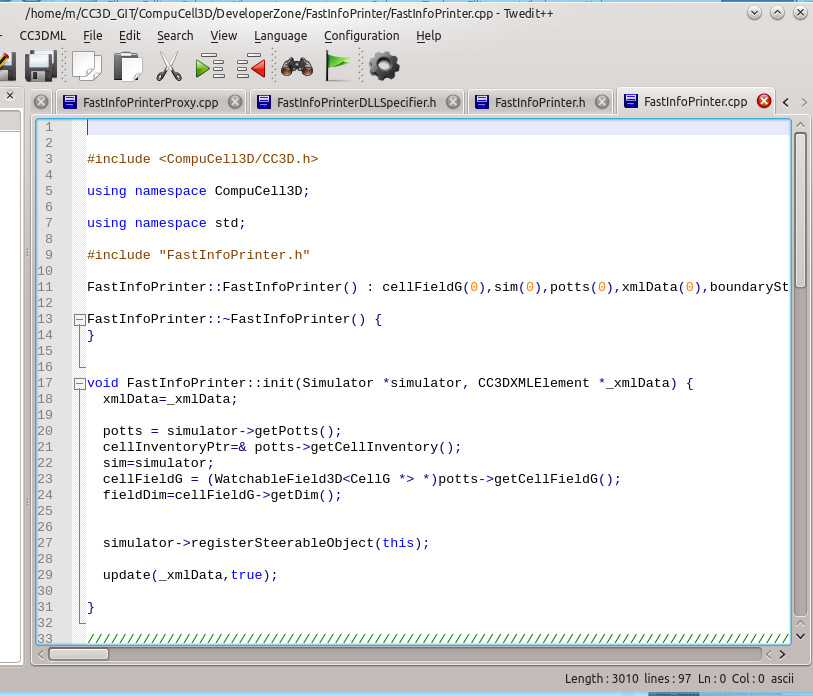
This after completing this step Twedit++ will generate a template code for the new module:
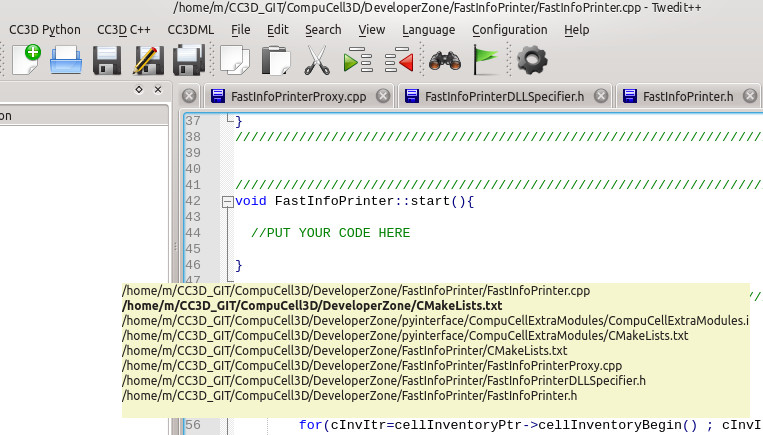
In this particular case there were 7 files that were generated/modified during module addition process Pressing Ctrl+Tab in Twedit++ will display names of those files in the pop-up dialog:
Now that our new code is generated. All we need to to is to compile it and make sure that the newly generated module gets placed in the existing CC3D installation directory. The next section describes all the steps necessary to accomplish it
Compiling Autogenerated C++ Steppable
To compile Modules in the DeveloperZone including the one we have just generated we use CMake and follow similar set of steps as during "regular" CC3D compilation
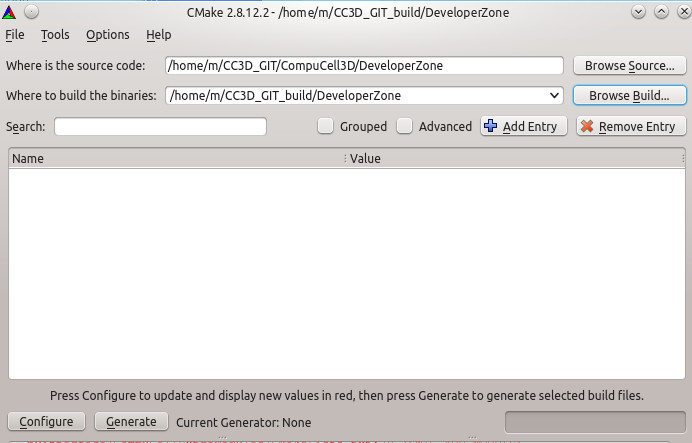
As shown in the screenshot above we select /home/m/CC3D_GIT/CompuCell3D/DeveloperZone as a location of source code with our new modules (FastInfoPrinter was generated in that folder) and select a build directory (in my case I used /home/m/CC3D_GIT_build/DeveloperZone). We click Configure in the CMake and this gets us to the next dialog:
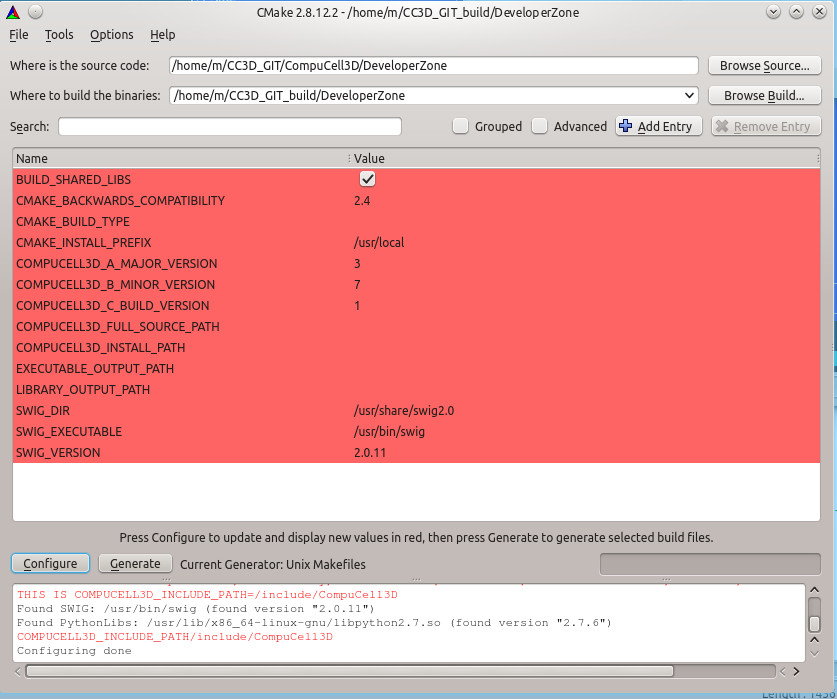
Here we will need to fill several lines that describe build type , location of existing CC3d installation and the location of CompuCell3D main source tree. The screenshot belo summarizes that changes you have to make:
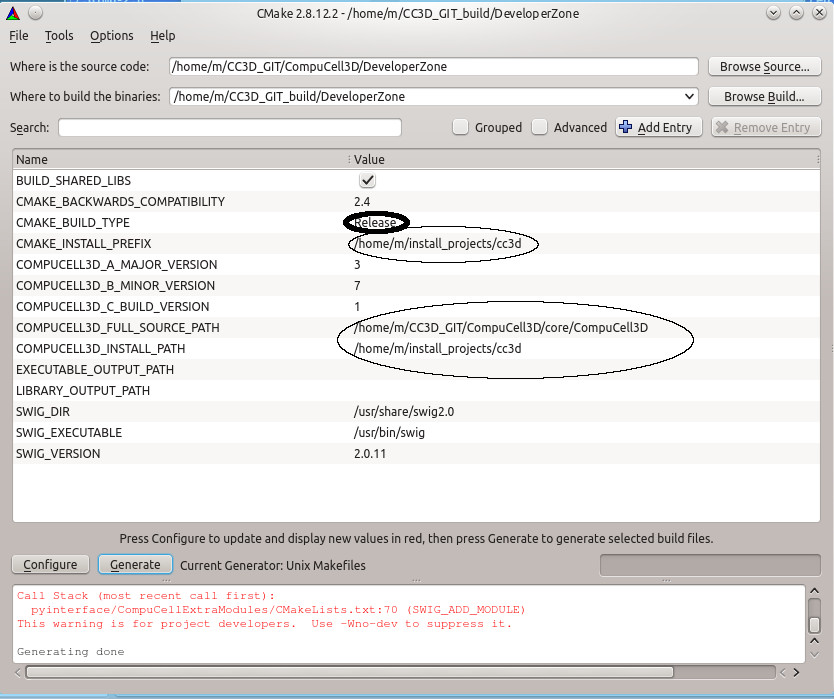
Let's go over those:
CMAKE_BUILD_TYPE - here we Type Release to indicate that we are building optimized version of the C++ module (you may choose Debug if you want to debug your steppable)
CMAKE_INSTALL_POREFIX - this line asks for a location of existing CC3D installation. Since I have compiled CC3D earlier and installed it into /home/m/install_projects/cc3d this is the directory I am picking.
COMPUCELL3D_FULL_SOURCE_PATH - this one is a bit tricky to guess right but this is a directory that has the following subfolders Automaton, Boundary, Potts3D, etc... In my case it is /home/m/CC3D_GIT/CompuCell3D/core/CompuCell3D. In your case it will be <cc3d_git_dir>/CompuCell3D/code/CompuCell3D
COMPUCELL3D_INSTALL_PATH - this one is exactly the same as CMAKE_INSTALL_PATH (item 1.) so we type /home/m/install_projects/cc3d
After putting all this information we click Configure followed by Generate and we are ready to compile our new module.
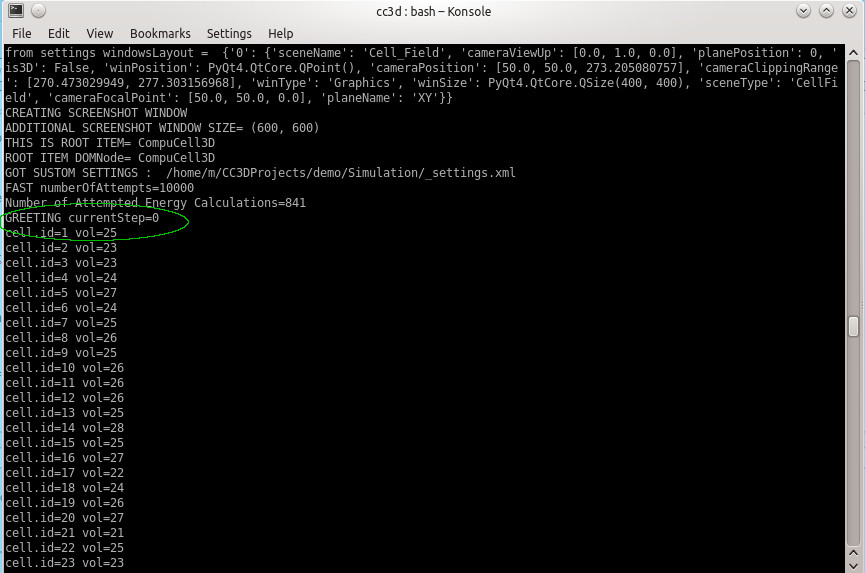
One thing to notice is that that I added a special printout to the generated code to make sure that when I run the code it is the module I generated and not some other module:
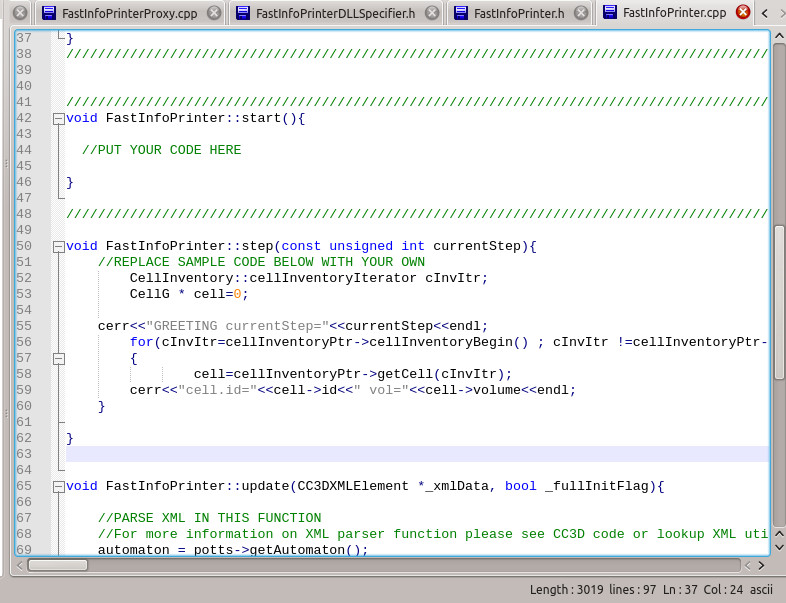
As you can see here I added word GREETING to the print statement in C++ code
Compiling Newly Generated C++ Steppable
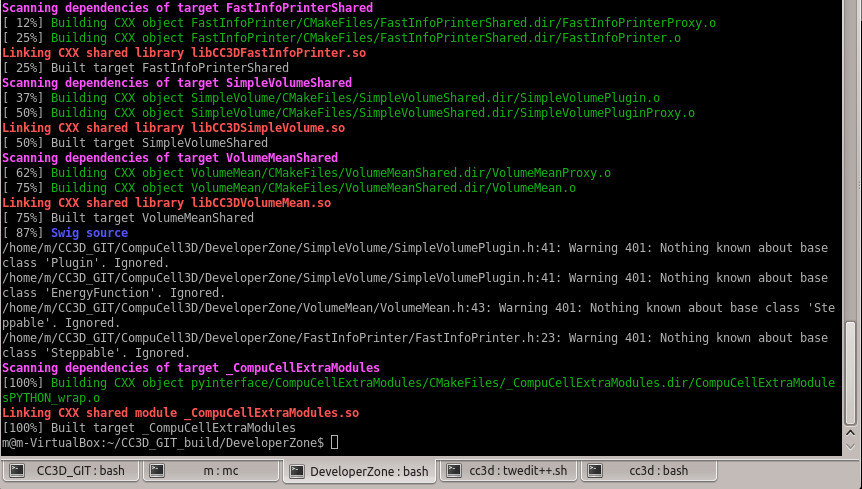
To compile our new code we go to the build directory (second line in the CMake Gui - /home/m/CC3D_GIT_build/DeveloperZone) and type make:

After the compilation is complete you should see something like this:
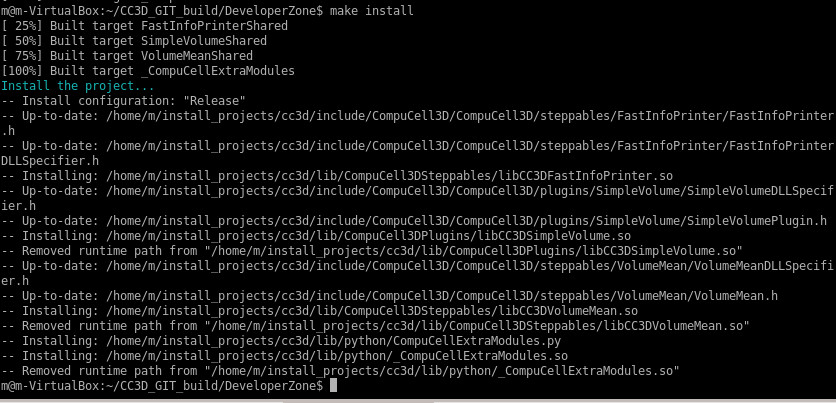
At this point we type make install which places our newly generated module in the CC3D installation folder - /home/m/install_projects/cc3d
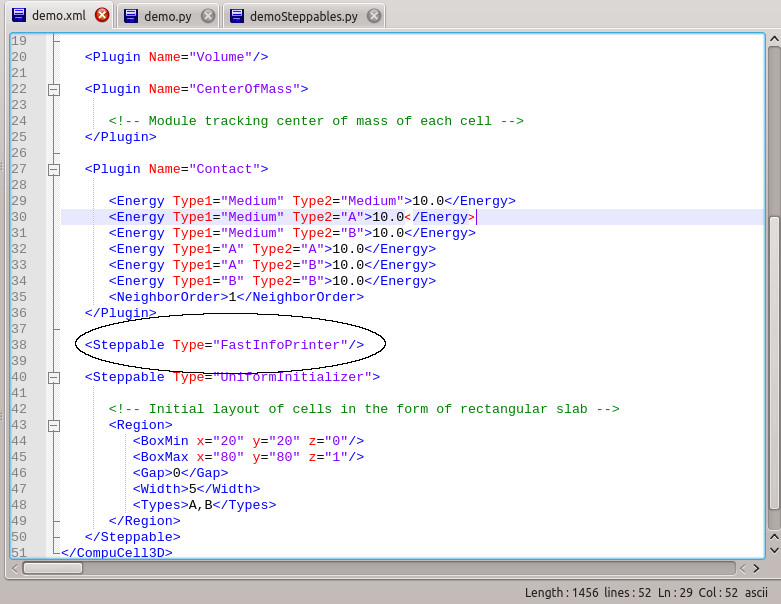
To use our newly generated Steppable. we open up one of the CC3D simulations and in the XML file we add FastInfoPrinter as follows:
When we run a simulation with FastInfoPrinter in it, we will see the following output:
This completes the process of generating and building C++ Compucell3D Steppable using Twedit++ and the DeveloperZone folder