
Developing CompUCell3D plugins under Windows using Cmake and MS Visual Studio 2005 (version 8)
CompuCell3D Windows can enhance their simulations by developing customized plugins in C++.
In this document we will explain how to set up build system using Cmake and Visual Studio necessary to build additional CompuCell3D plugins and steppables.
We assume that you have Visual Studio 2005 and CMake installed on your machine. CMake is free (www.cmake.org) but Visual Studion is not and you might need to purchase appropriate license. Some universities have access to educational licenses for Visual Studion which are either free or have reduced price so you might want to check this before paying full price.
OK, let's get started. Make sure you have CompuCell3D version on your machine that contains a directory called DeveloperZone. There you will find all the CMake files necessary to develop plugins There are also examples of plugins that you might study and reuse to build your own modules.
I have copied the DeveloperZone directory c:\cmake_programs\cc3d_plugin and this directory will be my work directory.
First thing you want to do is to open Cmake on your machine and setup source and build directories:
notice that I put as a path to the source code c:\cmake_programs\cc3d_plugin – this is precisely the location where I copied the content of Developer_Zone directory
Next you need to choose the the directory where Cmake and Visual Studio will store various build files.
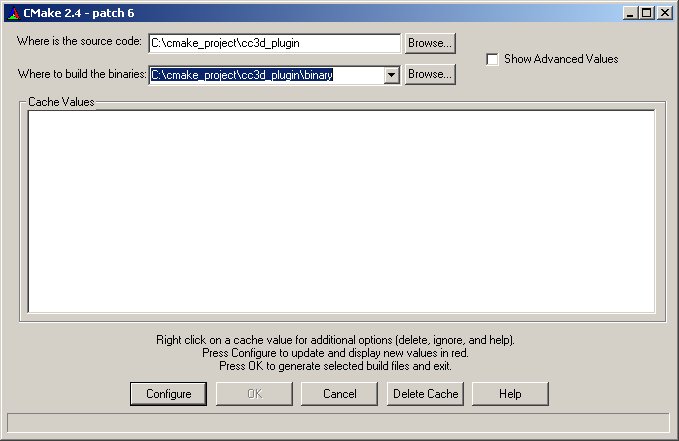
I have chosen it to be c:\cmake_programs\cc3d_plugin\binary. You may pick different location and name.
The next step is to start configuration of CMake build system by pressing configure button. You should get the following screen as a result:
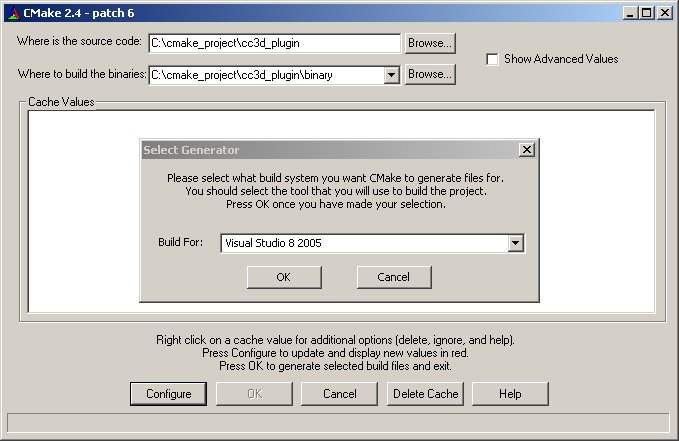
Here you need to choose Visual Studio 8 2008. There are other options to choose from but have tested CompUCell3D using Visual Studio 8 2005. If you are interested in compiling CompUCell3D using other compilers let us know and we can help you get started with this task
Anyway, after you picked Visual Studio 2005 you will get the following screen:
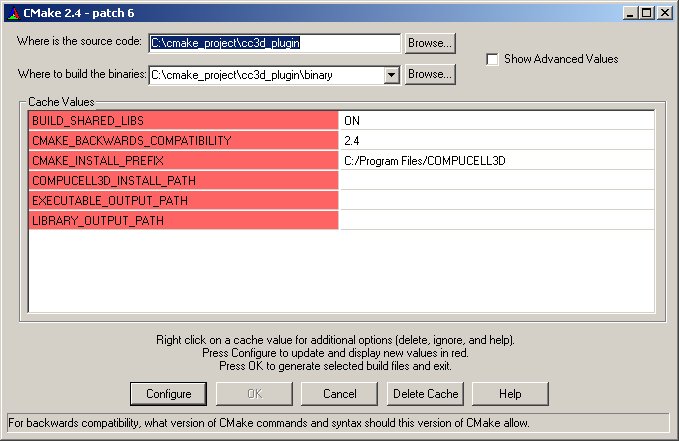
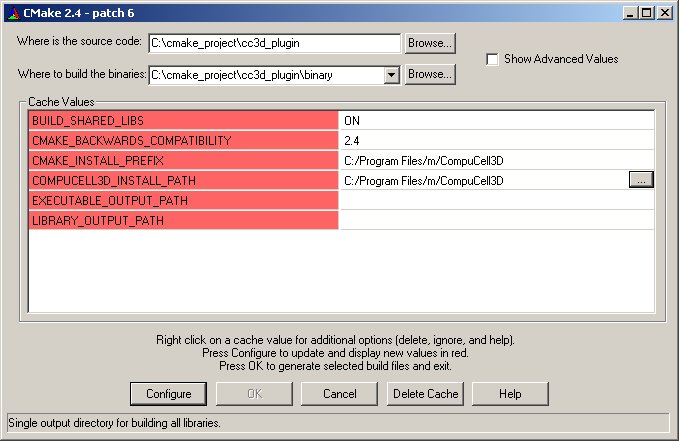
Now you need to choose installation paths for CompuCell3D (COMPUCELL3D_INSTALL_PATH) and path to the directory where you want your new plugins to be installed (CMAKE_INSTALL_PREFIX) once you build them. Typically the two paths will be identical. To choose installation paths click white space next to red CMAKE_INSTALL_PREFIX field and you will get a file select dialog button (marked as “...”):

Now you may either select appropriate directories using file select dialog or simply type their paths it is up to you. Here is a screenshot of the Select Path dialog that pops up once you click “...” button
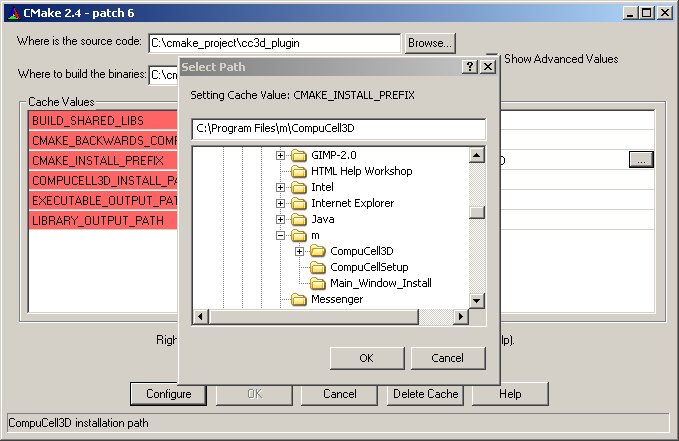
In my case, since CompuCell3D was installed in c:\Program Files\m\CompuCell3D , I typed this path next to CMAKE_INSTALL_PREFIX and COMPUCELL3D_INSTALL_PATH:
now that everything is set up you need to hit configure and once OK button becomes visible click OK. In some cases you might need to click configure more than once before you get OK button available. This is normal and you should follow on screen instructions that CMake prints.
You might also get messages that look like an error message:

however they are only debug printouts from CMake.txt configuration files , not an actual error. The true error message would look similar but would begin with “CMake Error: ...”
Now, once you pressed OK button Visual Studio files were generated and you are ready to open them up in Visual Studio.
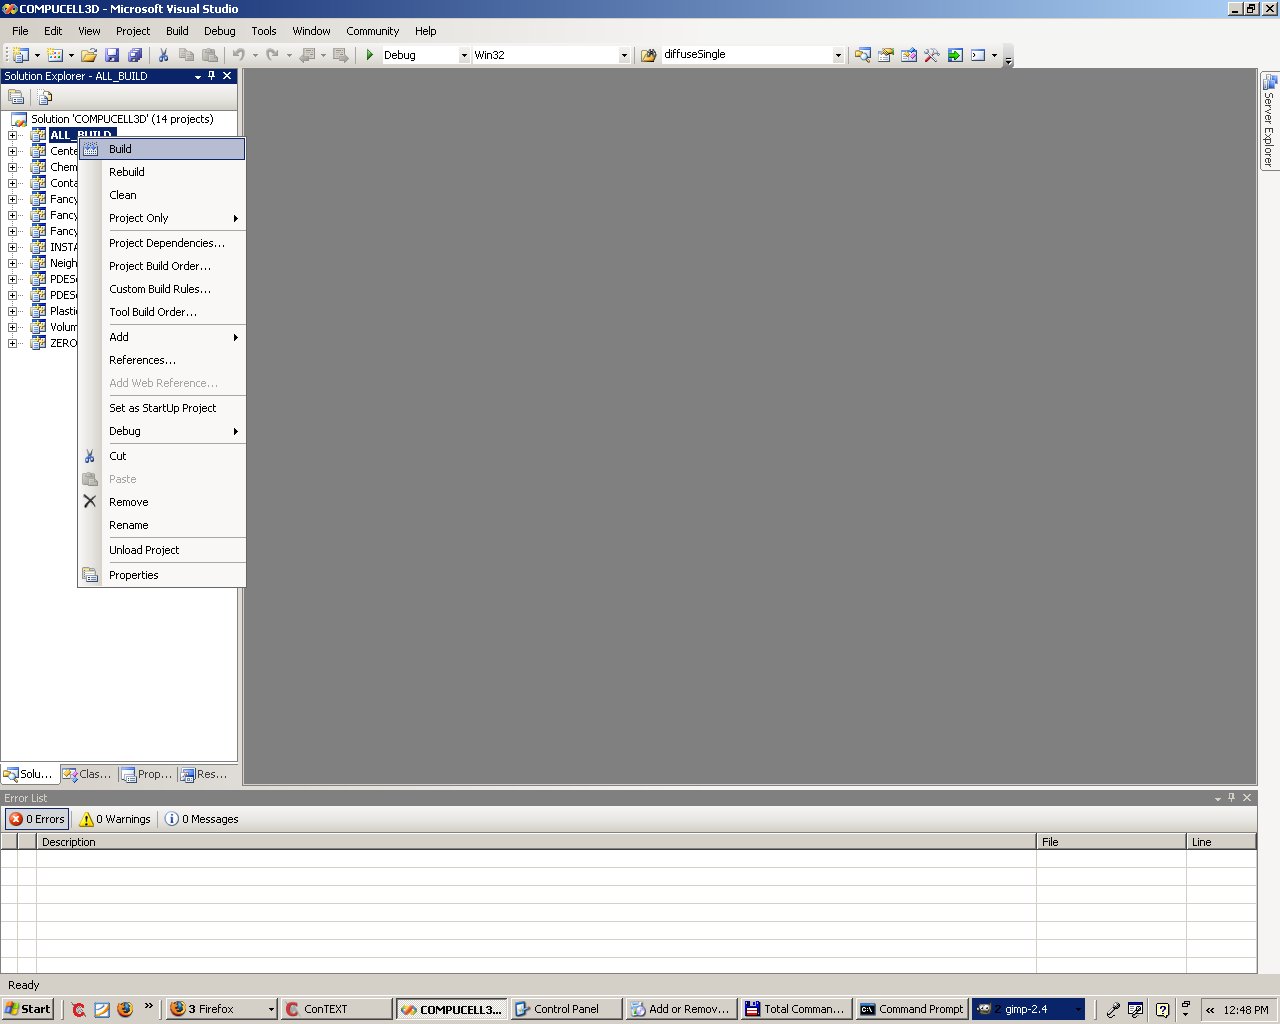
In my case I need to go to c:\cmake_programs\cc3d_plugin\binary and from there open up the project called All_BUILD:

Before going any further go Build->Configuration Manager... and select Active solution configuration to be Release.
Next, to compile the project, right click ALL_BUILD and select build from pop up menu:
The compilation begins and once it finishes without errors all you need to do is to install newly created plugin into the place where other CompuCell3D plugins are installed. Right click on INSTALL project and select Build option:
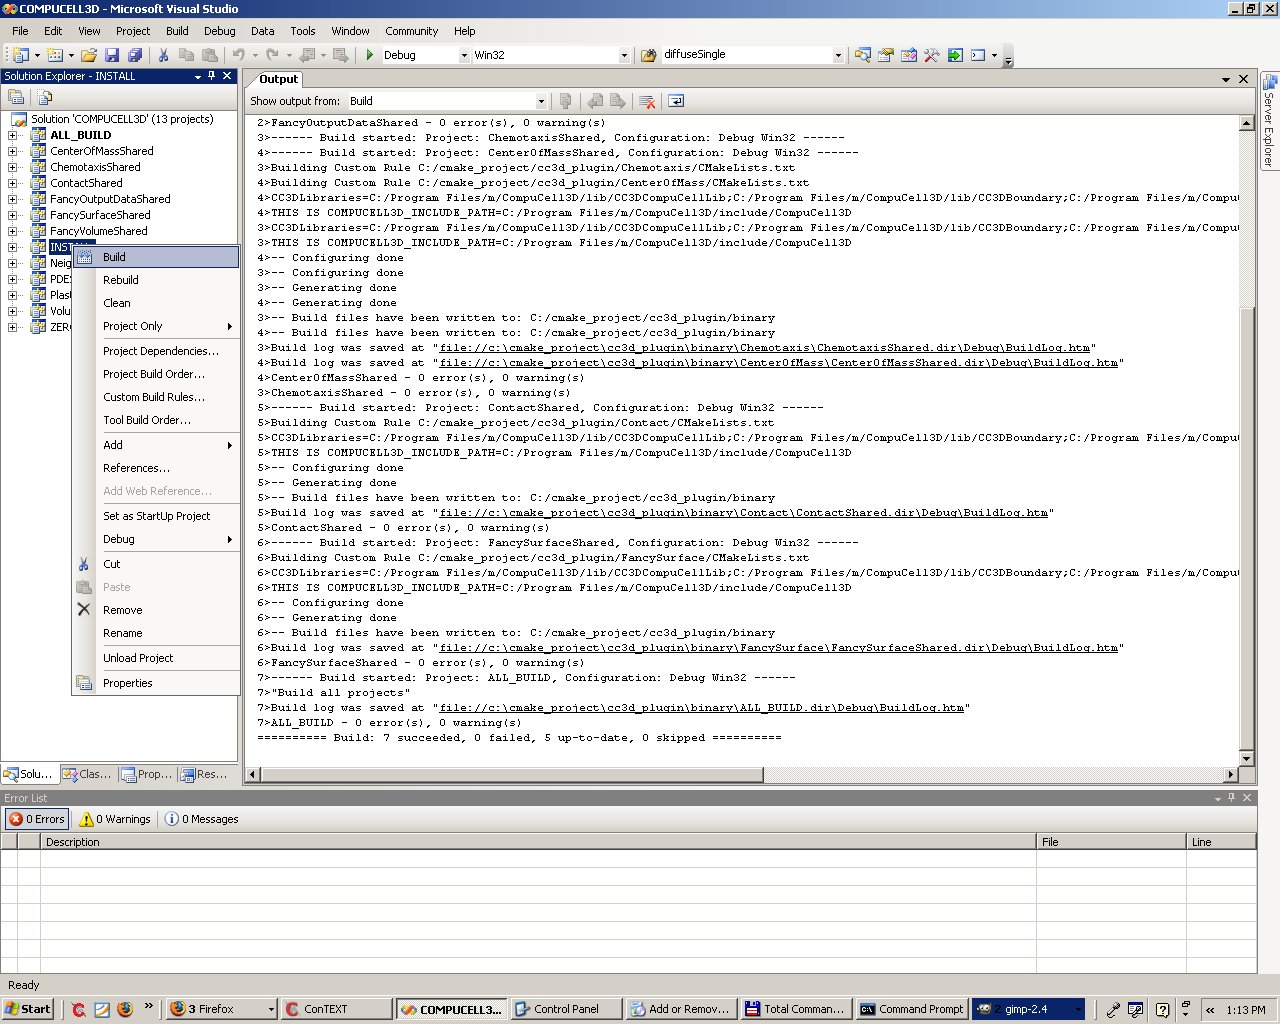
Now all the demo plugins were compiled and installed in the CompuCell3D installation directory on my windows machine.
To compile your own plugins you need to make directory that would contain CmakeLists.txt file and source code for your plugin and then in add subdirectory to the CMakeLists.txt file in the main directory (c:\cmake_programs\cc3d_plugin\):
${COMPUCELL3D_LIBRARY_PROPERTIES})
SET_TARGET_PROPERTIES(${LIBRARY_NAME}Shared PROPERTIES OUTPUT_NAME CC3D${LIBRARY_NAME}${LIBRARY_SUFFIX})
INSTALL_TARGETS(/lib/CompuCell3DSteppables RUNTIME_DIRECTORY /lib/CompuCell3DSteppables
${LIBRARY_NAME}Shared)
ENDMACRO(ADD_COMPUCELL3D_STEPPABLE)
add_subdirectory(Volume)
add_subdirectory(Contact)
add_subdirectory(NeighborTracker)
add_subdirectory(CenterOfMass)
add_subdirectory(Chemotaxis)
add_subdirectory(Plasticity)
add_subdirectory(PDESolverCaller)
add_subdirectory(FancyOutputData)
add_subdirectory(FancyVolume)
add_subdirectory(FancySurface)
add_subdirectory(YOUR_PLUGIN) # this is how you add plugin directory
#to the main CMakeLists.file
Looking at the CMakeLists.txt files for plugins one can see that configuring new plugin using CMake requires listing plugin's source files as parameters of ADD_COMPUCELL3D_PLUGIN and ADD_COMPUCELL3D_PLUGIN_HEADERS ( ADD_COMPUCELL3D_STEPPABLE
and ADD_COMPUCELL3D_STEPPABLE_HEADERS) macros.
For example adding a steppable (also a type of plugin) FancyOutput requires the following CmakeLists.txt configuration file:
ADD_COMPUCELL3D_STEPPABLE(FancyOutputData
OutputData.cpp
OutputDataProxy.cpp
LINK_LIBRARIES ${CC3DLibraries})
ADD_COMPUCELL3D_STEPPABLE_HEADERS(FancyOutputData
OutputData.h
)
For more examples please consult examples in the DeveloperZone directory and also read developers manual for Linux and OSX where you can find much more detailed discussion on how to write plugin source code and how to set up CMakeLists.txt configuration files.
Notice however that there are some differences in the CmakeLists/txt files for Linux/OSX and for Windows so when developing for Windows make sure you are using the right style of the CMakeLists.txt file.